Non-Federal User Registration
To watch the eLearning video and view/download training resources, visit Lesson 1b: Register as a Non-Federal User.
| Tip: If you are unable to access your Login.gov account after setting it up, please review the TRACS Non-Federal Login Troubleshooting Guide. |
|---|
Login.gov access
1. From the TRACS login screen (https://tracs.fws.gov), Non-Federal users click “Sign-in with Login.gov”.
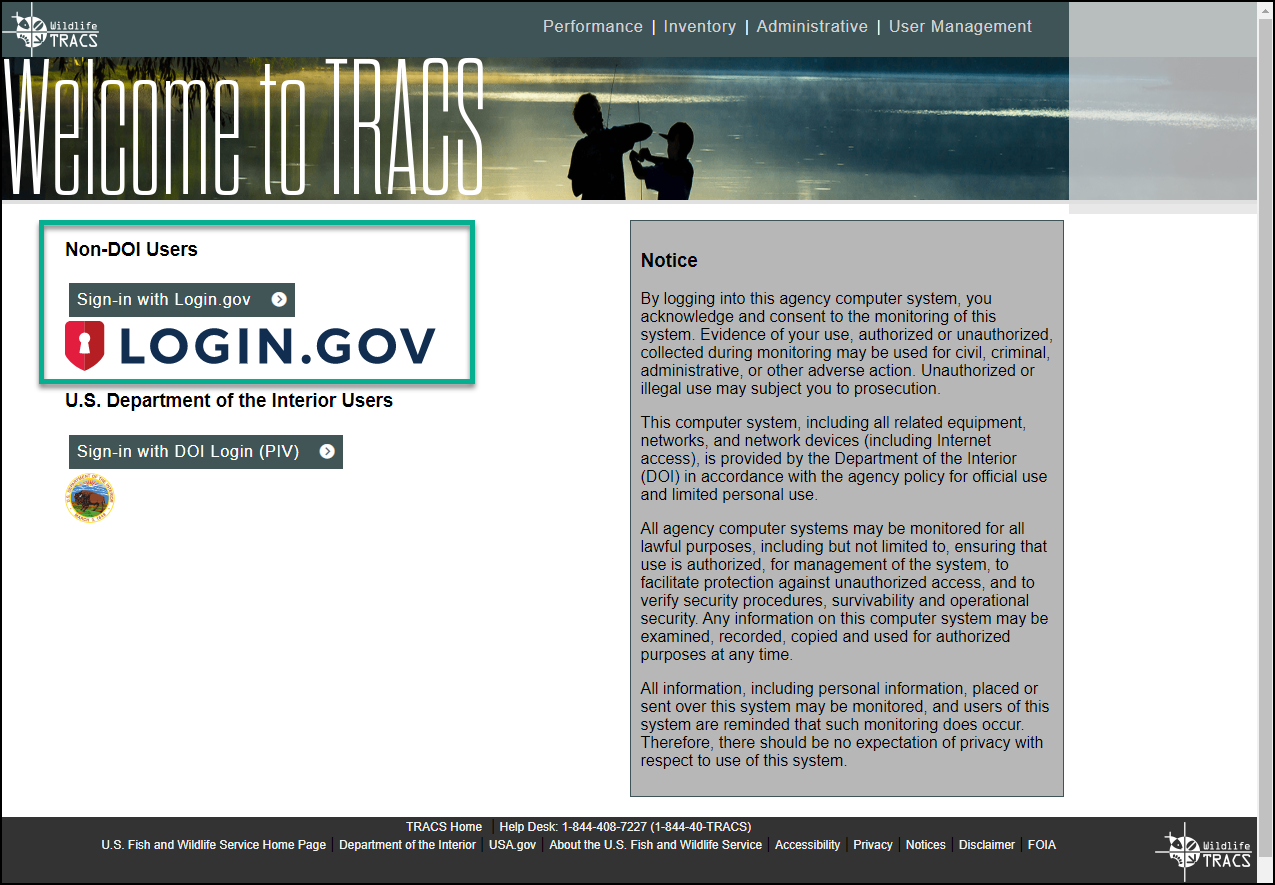
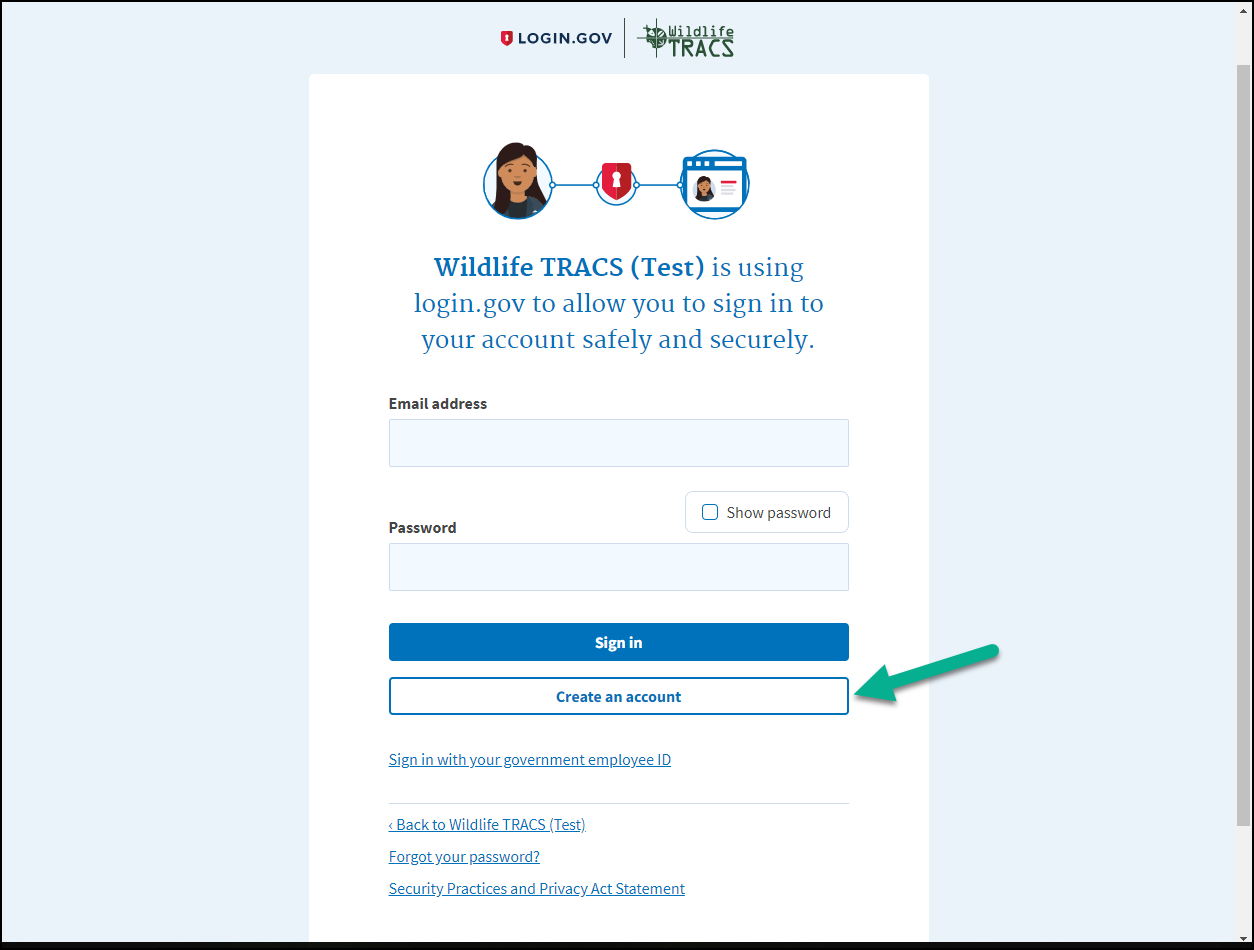
2. The LOGIN.GOV sign-in page opens.
a. If you already have a login.gov account from a different system, enter your email address and password to login (skip to step 8).
b. If you do not have an account, click “Create an account”.
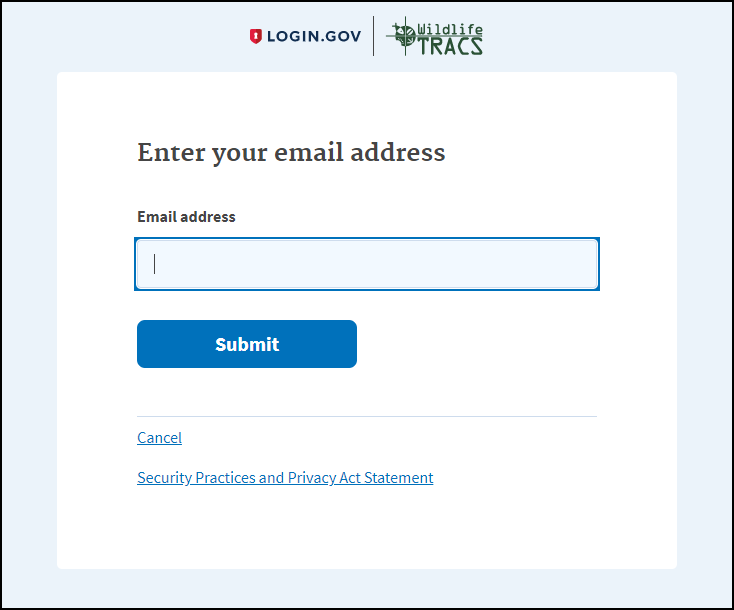
3. Enter your business email address and click “Submit”. Do NOT use a personal email address, unless you work for an agency in an insular area/territory that does not have business email addresses.
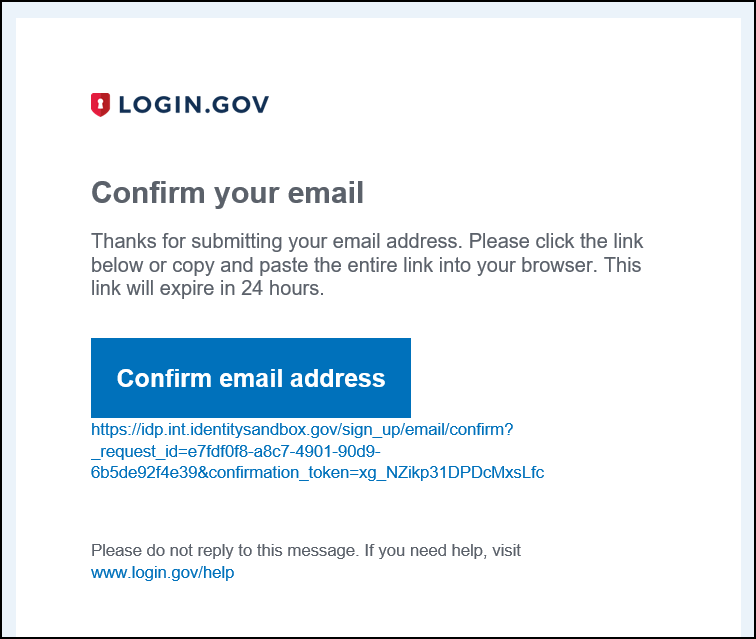
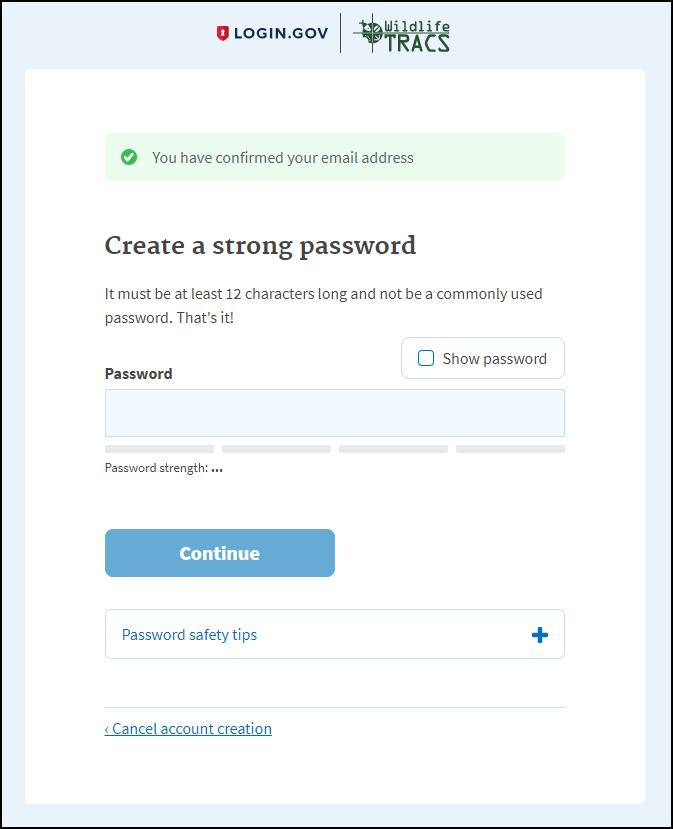
4. Check your email for the confirmation message (check your spam/junk folder if it is not found). On the LOGIN.GOV screen, click “Resend” if needed. In the email, click “Confirm email address”.
5. The password page will open. Enter a strong password. Your password should not be a commonly used password. It must be a minimum of 12 characters and contain a combination of lower and upper case characters, and contain at least one non-alphanumeric character, such as: #*$%!. Numeric characters are optional.
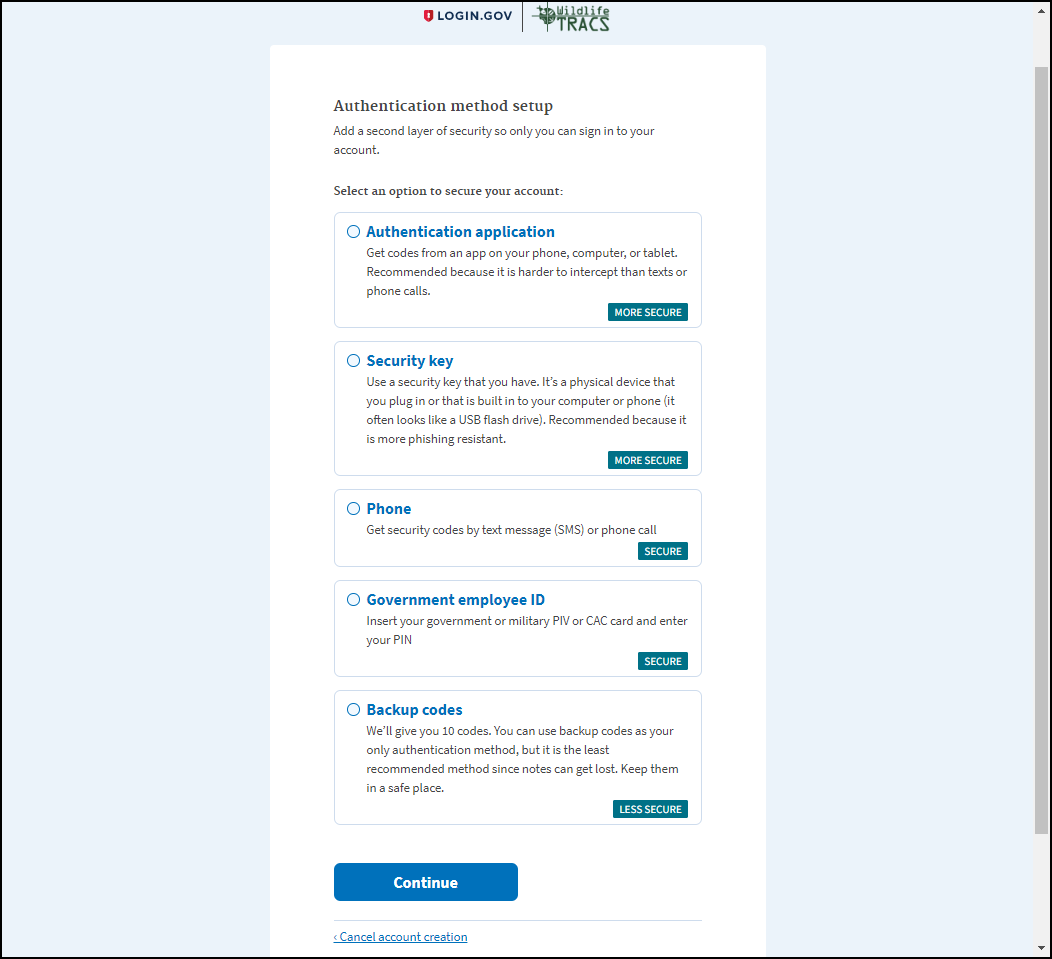
6. Login.gov requires a two-factor login with a password and an additional authentication method. Please select either phone (for SMS text messages or a phone call) or the authenticator app. We recommend using the “phone” option with a cell phone (standard U.S. phone number only) that can receive SMS text messages as your backup, or if you have a landline, select the phone call option.
- Note: Users from Guam may use their cell or landline phone if it has the area code 671 by selecting “Guam” from the Country list.
- Users from CNMI cannot use a phone with the area code 670 as it not recognized by Login.gov. If you do not have a phone with a standard U.S. number without the area code 670, then use the “Authentication application” method instead. An authentication app is available for your computer or browser if you do not have a smart phone or tablet.
a. Enter your cell phone number and select “text message (SMS)” as the method for receiving a code. Click “send code”. Check your cell phone for the code and enter it within 10 minutes.
b. Enter your security code before it expires in 10 minutes. Select “get another code” if the time has elapsed. After entering the code, select “Submit”.
7. Click “agree and continue”.
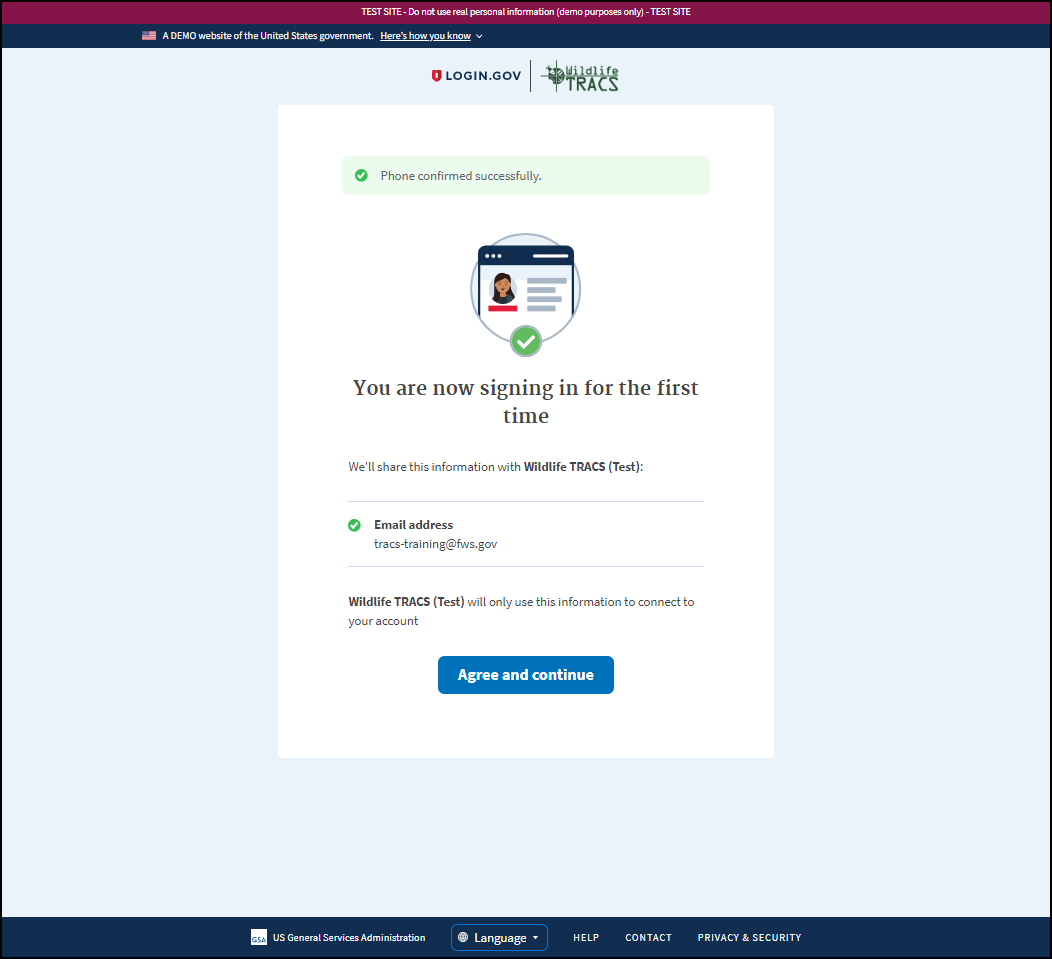
8. You will be redirected to the TRACS Registration page (see steps below).
Complete the TRACS Registration
9. If you do not have a TRACS account yet, the TRACS registration page opens. Click “Register for access”.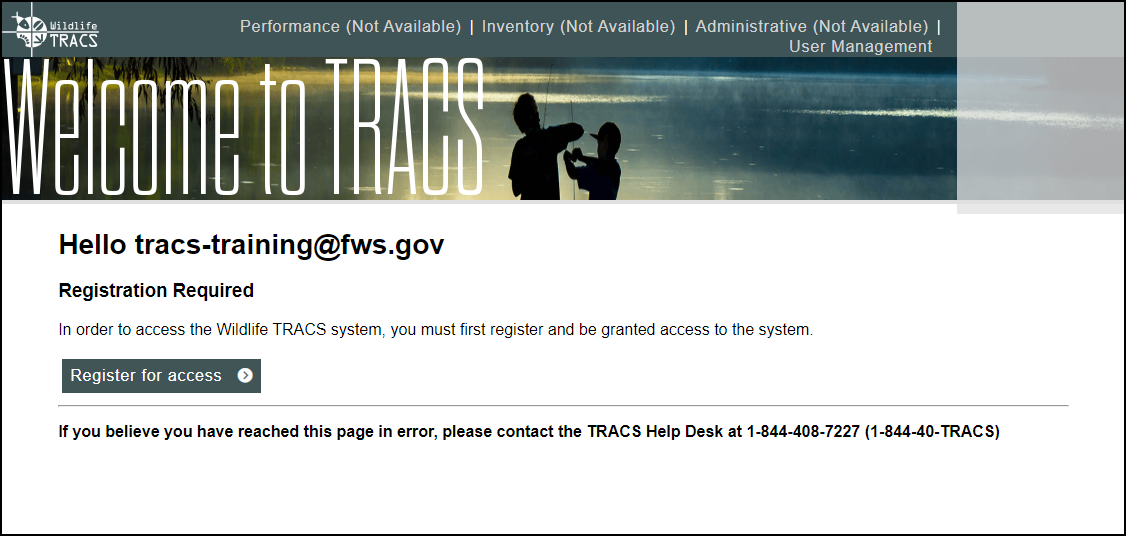
Note: You should be redirected to TRACS and be logged in. If the site does not open, close your browser window and open a new one and go to: https://tracs.fws.gov/login. If TRACS does not open, you may already be pending approval by your agency’s user administrator. Contact your agency’s user administrator or the TRACS help desk for assistance at tracs-helpdesk@fws.gov or call 1-844-408-7227.
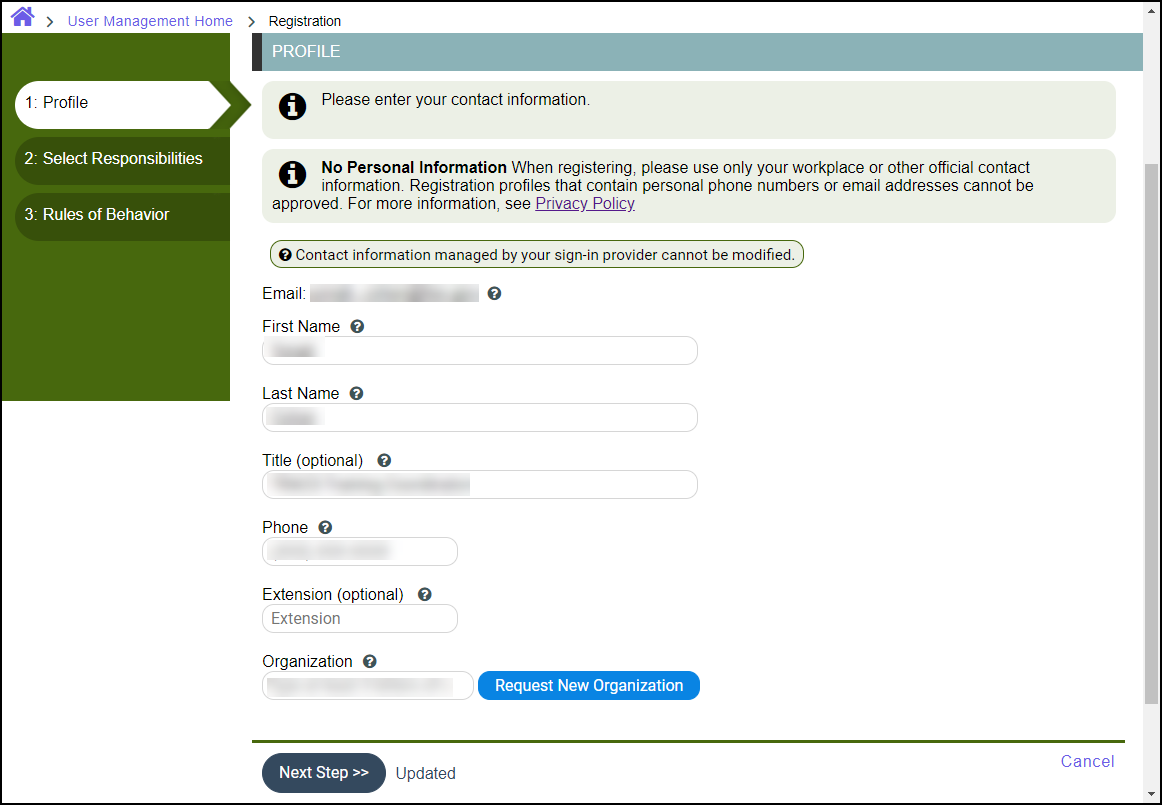
10. Fill out the Profile page. (Note: On the registration forms, the tabs on the left side are not clickable since the forms must be completed in order).
a. Email: defaults to the email provided in Login.gov (cannot be changed)
b. First & Last Name
c. Title (optional)
d. Phone (Extension optional)
e. Organization: Type at least 3 letters of the full organization name to search for it (e.g. “Ore” to search for “Oregon Department of Fish and Wildlife”). Select the organization from the list. Note: The system cannot search for acronyms or abbreviations (such as ODFW or OR Dept. F&W).
i. If not found, click “Request New Organization”. Fill out the Organization Name with the full organization name (no abbreviations) and website (if available), then click “Request Organization”.
f. Once all required fields have been entered, click “Next Step”.
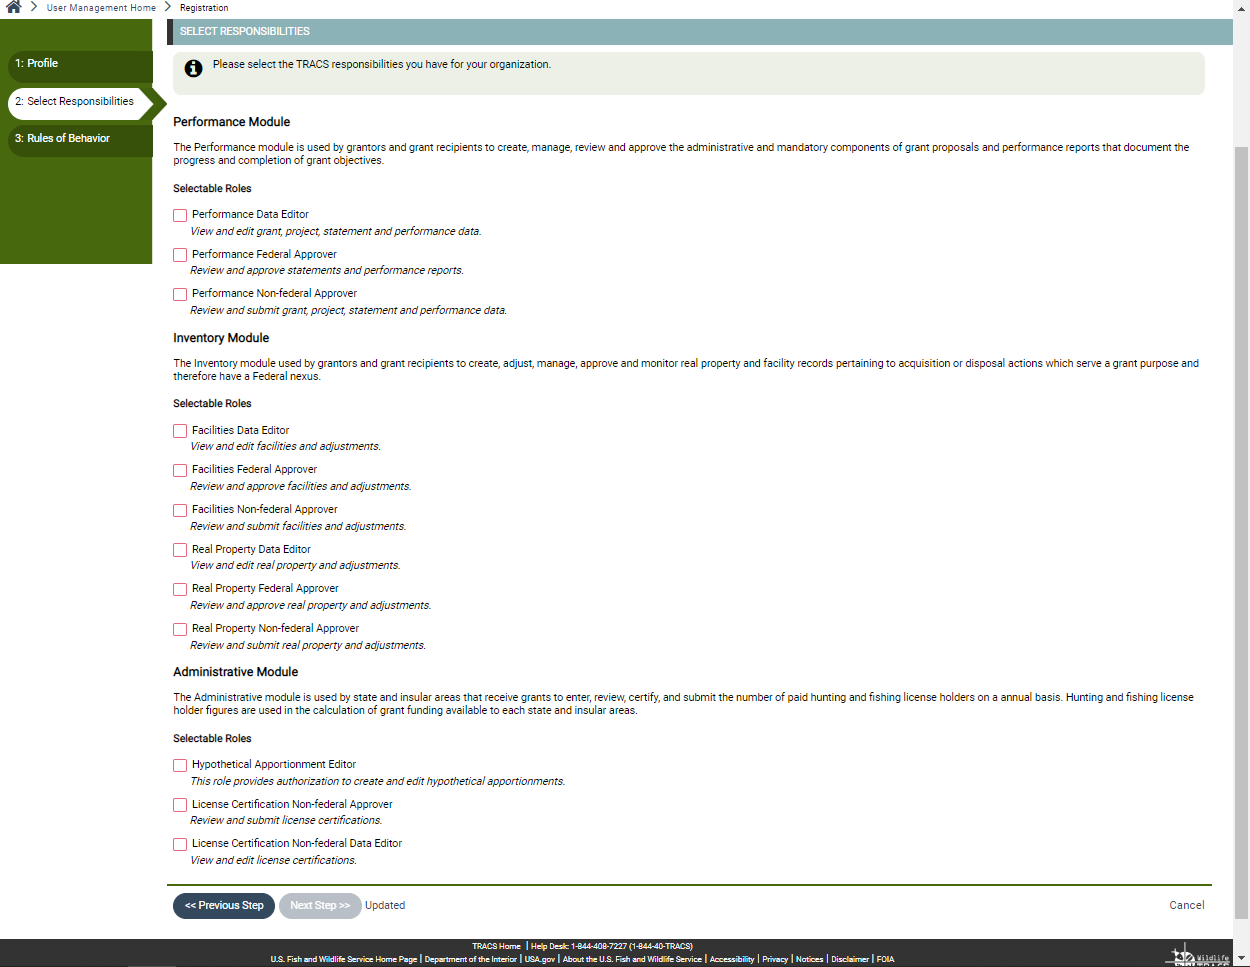
11. Select Responsibilities: please select the TRACS responsibilities you have for your organization by checking the appropriate boxes. Then click “Next Step”. Users who use the license certification and/or hypothetical apportionment role(s) will select them from the administrative module section.
The User Administrator for your agency/organization will verify the accuracy and validity of user requests prior to approval and may update your role/group permissions.
List of Roles by Module
Performance Module
The Performance module is used by grantors and grant recipients to create, manage, review and approve the administrative and mandatory components of grant proposals and performance reports that document the progress and completion of grant objectives.
- Performance Data Editor: View and edit grant, project statement and performance data.
- Performance Non-Federal Approver: Review and submit grant, project statement, and performance data.
- Performance Federal Approver: Review and approve statements and performance reports.
Inventory Module
The Inventory module used by grantors and grant recipients to create, adjust, manage, approve and monitor real property and facility records pertaining to acquisition or disposal actions which serve a grant purpose and therefore have a Federal nexus.
- Facilities Data Editor: View and edit facilities and adjustments.
- Facilities Non-Federal Approver: Review and submit facilities and adjustments.
- Facilities Federal Approver: Review and approve facilities and adjustments.
- Real Property Data Editor: View and edit real property and adjustments.
- Real Property Non-Federal Approver: Review and submit real property and adjustments.
- Real Property Federal Approver: Review and approve real property and adjustments.
Administrative Module
The Administrative module is used by state and insular areas that receive grants to enter, review, certify, and submit the number of paid hunting and fishing license holders on a annual basis. Hunting and fishing license holder figures are used in the calculation of grant funding available to each state and insular areas.
- Hypothetical Apportionment Editor: Create and edit hypothetical apportionments.
- License Certification Non-Federal Data Editor: View and edit license certifications.
- License Certification Non-Federal Approver: Review and submit license certifications.
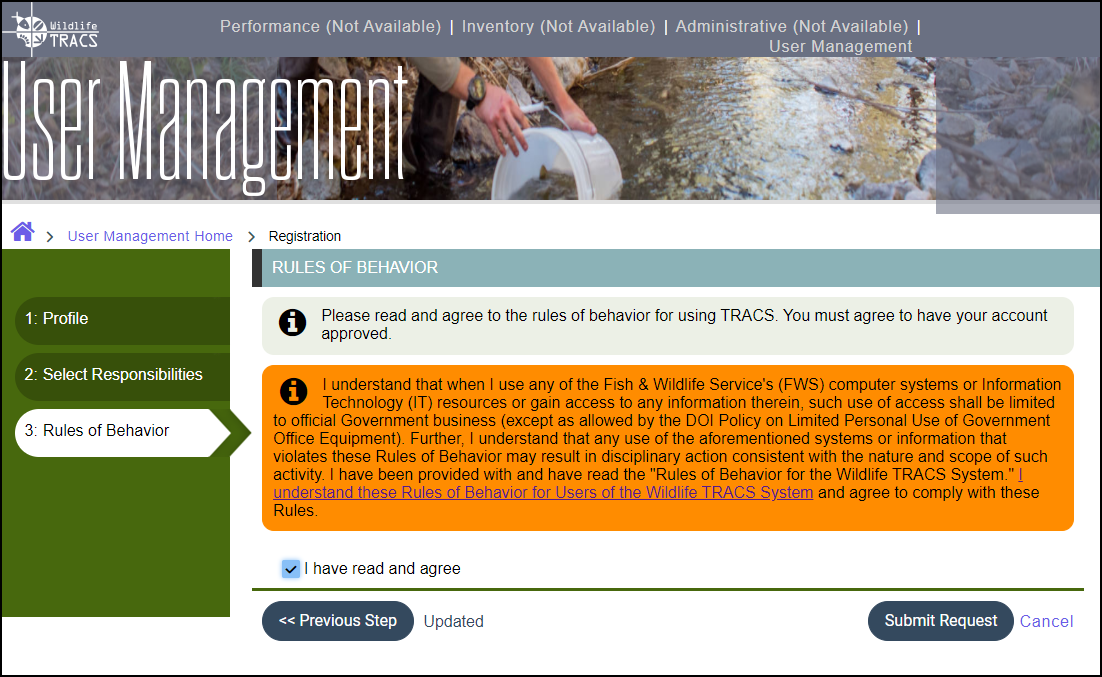
12. Review the Rules of Behavior. Check the box “I have read and agree”, then click “Submit Request”.
13. The “Registration Pending” page opens. The user administrator appointed for your organization will approve your account, typically within 1-2 business weeks. You will receive an email when your request has been approved and you can login!
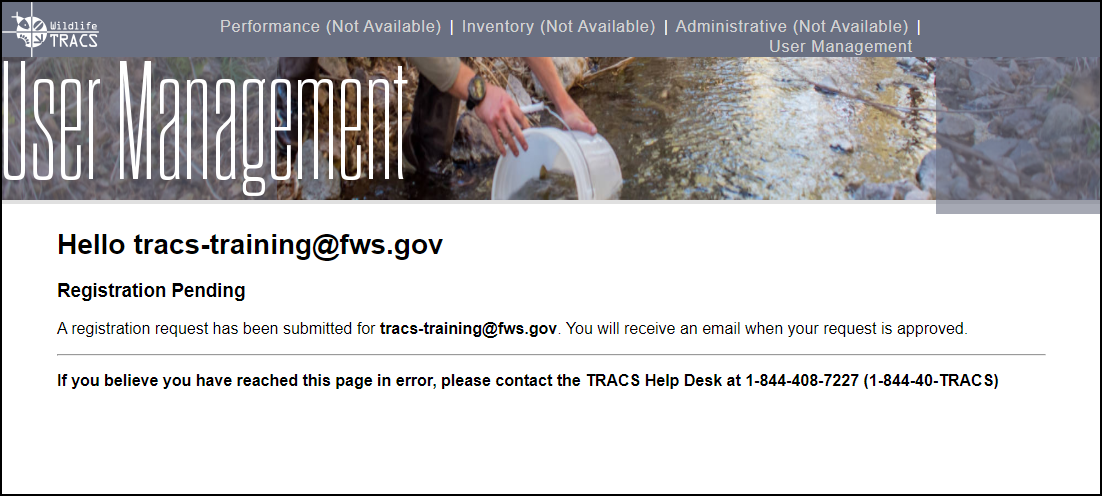
14. Close the tab or window, then complete the steps below to set up a secondary authentication method for Login.gov (highly recommended).
Set up Secondary Authentication Methods for Login.gov
We encourage you to add at least two methods for authentication to your account. If you lose access to your primary authentication method (i.e. forgetting or losing your phone), you’ll have a second option to use to get access to your account. If you select text or voice message, you are required to select an additional authentication method. Login.gov is unable to grant you access to your account if you get locked out and/or lose your authentication method. If you get locked out, you’ll have to delete your account and create a new one.
1. To edit or add to your authentication methods, open a new browser and sign in to your Login.gov account directly (instead of going through TRACS) at https://secure.login.gov/.
Note: If the page displays the TRACS logo, then you will need to clear your browser’s cache first (instructions here: https://clear-my-cache.com/en/windows.html)
2. The authentication page will open. Note: You must have your primary authentication method available to set up additional methods. Enter the code and click ‘Submit’.
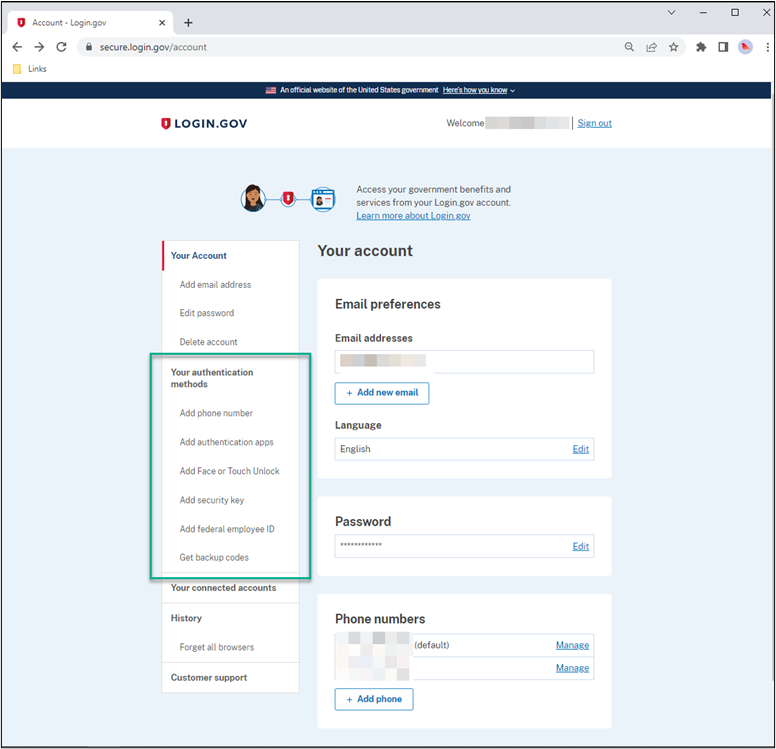
3. Once logged in, the account page will display. On the left side bar, select an authentication method to add.
We recommend adding at least one more phone number (cell phone or landline), and/or using an authentication app. If you do not have another phone number or device that can support an authentication app, then set up backup codes as your secondary authentication method (however keep in mind that if you lose the codes, you will be unable to use this authentication method).
We do not recommend using the security or Face or Touch Unlock since these methods require specialized devices and are not as reliable (and the Federal Employee ID is only for federal staff).
To learn more about the various methods visit: https://www.login.gov/help/get-started/authentication-options/
4. To add another phone number, select ‘Add Phone Number’ on the left side.
a. Enter your alternate phone number and select the method as ‘Text message (SMS)’ or for a landline select ‘Phone Call’. Note: You must have this phone available to complete the set up. Then click continue.
i. Note: Users from Guam may use their cell or landline phone if it has the area code 671 by selecting “Guam” from the Country list.
ii. Users from CNMI cannot use a phone with the area code 670 as it not recognized by Login.gov. If you do not have a phone with a standard U.S. number without the area code 670, then use the “Authentication application” method instead. An authentication app is available for your computer or browser if you do not have a smart phone or tablet.
b. You will receive a text message or phone call to the phone number added. Enter the security code you received via text or phone call. Click ‘Submit’.
c. The phone number will display on your account page.
5. To add an authentication app, select “Add authentication apps” on the left side. You will need to download an approved authentication application to your smartphone, tablet or computer first (see the list here: https://www.login.gov/help/get-started/authentication-options/)
a. The ‘Add an authentication app’ window opens. Follow the steps on the page to set up the app.